Archive
High Res Screenshots of WPF Apps
A while ago, I needed to take a few screenshots of our Point of Sale system to be printed on a large banner. Unfortunately, ordinary screenshots do not scale well. Since the native resolution of the application is only 1024×768, I got a very blurry image when printed. Not good!
Fortunately, WPF is vector based. This means that it is possible to render your application’s GUI in any resolution or with any DPI setting you like. To do so, we simply use the RenderTargetBitmap class. Its constructor takes the target DPI, size and pixel format. The Render method takes any visual and renders it according to the given settings. The RenderTargetBitmap is a BitmapSource, which can easily be saved with (for example) a PngBitmapEncoder.
// Determine size (if the visual is a UIElement)
UIElement uiElement = visual as UIElement;
if (uiElement != null)
{
  width = (int)uiElement.RenderSize.Width;
  height = (int)uiElement.RenderSize.Height;
}

// Render
var rtb = new RenderTargetBitmap(width, height,
                                 dpiX, dpiY,
                                 PixelFormats.Pbgra32);
rtb.Render(visual);

// Encode and save to PNG file
var enc = new PngBitmapEncoder();
enc.Frames.Add(SBitmapFrame.Create(bmp));
using (var stm = File.Create(filename))
  enc.Save(stm);
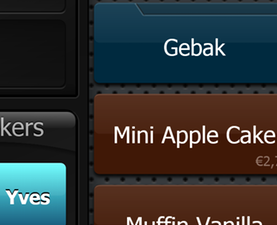
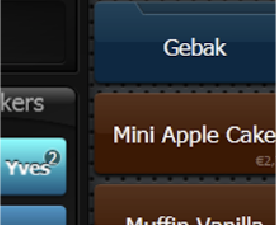
The images below show the difference between an ordinary screenshot (right) and a ‘screenshot’ taken with the technique described above (left). It’s clear that the left image is crisp and can be used for high quality printing while the right one quickly becomes pixellated when it is enlarged.
 |
 |
| High Resolution Screenshot | Ordinary Screenshot |
There is one caveat. We need to build this screenshot ability straight into the application itself since that is the only way to get a reference to the Visual we want to render, or is it? Tools such as Snoop, Crack.NET and Mole are able to show the compete visual tree, visual previews, etc. of WPF apps. This got me thinking. Apparently, these tools can somehow hook into or ‘take over’ other apps. I still don’t really get how they do this, but what I do know is that they provide access to any visual within any WPF application. Integrating high res screenshot capabilities in these applications is thus relatively easy.
I’ve done this for Snoop. The result can be downloaded here (just unzip and run).
EDIT: This is now integrated in Snoop (See first comment to this post, thanks Cory!). (Source: http://snoopwpf.codeplex.com/SourceControl/changeset/changes/65551)
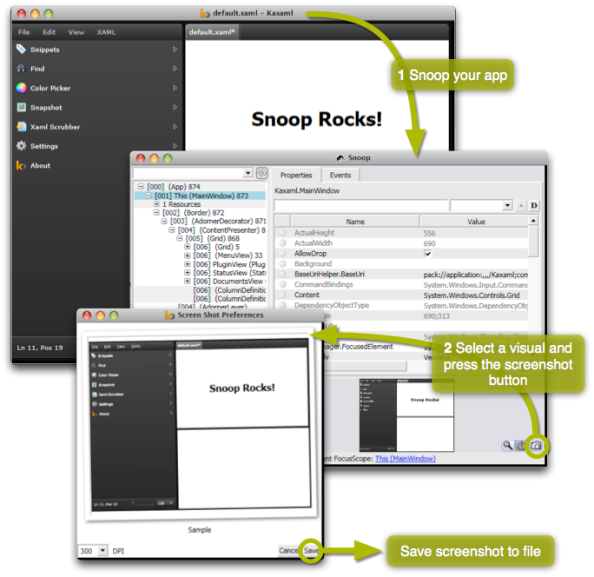
This is what you’ll get:
Setting the Culture in WPF Applications
The culture of an application not only specifies its language but also more specific culture related things such as date (e.g., mm/dd/yy or dd/mm/yyy) and number formatting (1.23 or 1,23) and default currency.
Usually your application gets its culture from the operating system. In some cases, you might want to set it yourself. The most obvious way to set a culture pragmatically in C# is as follows.
xmlLanguage = XmlLanguage.GetLanguage("nl-BE");
Thread.CurrentThread.CurrentCulture = xmlLanguage;
Thread.CurrentThread.CurrentUICulture = xmlLanguage;
There are two caveats to this. First of all, this only sets the culture for a specific thread. To my knowledge, there is no way to set the culture application-wide so you will have to set the culture for each thread you create. If you only need the culture to localize the user interface, I suppose this is not required since the UI runs on a single thread anyway.
I thought this was all there was to it, until I used a binding in XAML which had a culture specific formatting string:
<TextBlock Text="{Binding Order.Price, StringFormat='{0:F2}'}"/>
Depending on the culture, the ‘F2’ formatting string produces “1.23” or “1,23”. The problem was that it did not format as I expected based on the previously set culture. By adding a DebugConverter to the binding, I was able to inspect which culture was used by the binding. It was ‘en-US’ instead of ‘nl-BE’, the former being the default culture used by a binding. Apparently, the culture used by the binding and passed to its (optional) converter, if not set explicitly by assigning the Binding.ConverterCulture property, can be set globally at the top element of the XAML document with the xml:lang attribute.
Alternatively, you can set the culture globally as follows (see this post on msdn).
FrameworkElement.LanguageProperty.OverrideMetadata(
    typeof( System.Windows.FrameworkElement ),
    new FrameworkPropertyMetadata(XmlLanguage.GetLanguage("nl-BE") ) );
From now on, each binding will use the nl-Be culture by default.
Imaging System with Ubuntu + PartImage
This article concisely describes how to create a bootable usb drive that can clone and restore a hard disc. I just wanted to write this down because I lost quite some time making this work twice already.
- Download and burn the Ubuntu Live CD v9.10 and boot from it.
- Attach the usb drive and format it (using GParted from the admin menu) in two partitions:
- fat32 (a few gigs suffices), where the bootable OS will be installed.
- ext3 (the rest), room for the images.
- Install the OS on the first partition and make bootable (admin menu -> create bootable usb drive)
- Eject the cd and boot from the usb drive
- Install PartImage: sudo apt-get update && sudo apt-get install partimage. You must first enable some repositories to make this work, see http://www.psychocats.net/ubuntu/sources
- You can now use PartImage to create and restore images.
How to Implement a Property
Below is a code snippet of how we implement non-trivial properties, involving event subscriptions and change notifications (through INotifyPropertyChanged). Unsubscribing from the old value’s events is particularly important to avoid memory leaks.
public Amount BatchAmount
{
  set
  {
    // Do nothing if the value hasn't changed (certainly avoid change notification)
    if (batchAmount == value)
      return;

    // Unsubscribe from the old value's events (prevent memory leak)
    if (batchAmount != null)
      batchAmount.PropertyChanged -= batchAmount_PropertyChanged;

    // Assign the new value
    batchAmount = value ?? new Amount(0, UnitPrice.Unit);

    // Subscribe on the new value's events
    batchAmount.PropertyChanged += batchAmount_PropertyChanged;

    // Notify property changed
    OnPropertyChanged("BatchAmount");
  }
}
Mercurial Branch-per-Feature Cheat Sheet
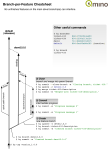
We recently started using the branch-per-feature commit strategy for our mercurial repository. Since this requires a bit more effort creating branches, committing, merging, etc., I have created a simple cheat sheet to help you with that.
Concatenate/Format Strings in XAML
Often, you will need to put dynamically concatenated strings on the screen. By this, I mean strings that are built at runtime by concatenating several static and non-static substrings. Something you would do in code as follows:
string formattedString = FirstName + " " + LastName;
// This is better performance-wise since a StringBuilder will be used internally, which means less objects will be created.
string betterFormattedString = string.Format("{0} {1}", FirstName, LastName);
To do this in XAML, you can take the naive approach below.
<StackPanel Orientation="Horizontal"/>
 <TextBlock Text="{Binding Name}"/>
 <TextBlock Text=" "/>
 <TextBlock Text="{Binding LastName}"/>
</StackPanel>
In this example, four UI elements are created: one StackPanel and three TextBlocks. This will have a performance impact since all these elements will need to go through a measurement and layout pass. In case this structure is used once or just a few times, you won’t notice this. However, if it is used in a datatemplate for use inside a list with many elements, you will notice a performance hit.
A better way to concatenate strings in XAML is shown below.
<TextBlock>
  <TextBlock.Text>
    <MultiBinding StringFormat="{}{0} {1}">
      <Binding Path="Name"/>
      <Binding Path="LastName"/>
    </MultiBinding>
  </TextBlock.Text>
</TextBlock>
In this case, we only create one UI element instead of four! Not only is this better performance-wise, it is also much more readable.
Hello world!
Welcome to WordPress.com. This is your first post. Edit or delete it and start blogging!

